Sunday, October 17, 2010

The Completed Shed

We finished building our new backyard shed.  We primed the trim and installed the window and doors. 

Pictures 015 

Earlier this summer, before our interlock was laid, we ran wiring underground to the back corner of the yard so that we could have power in the shed.  Now it’s a perfect storage and work space!

Sunday, September 26, 2010

Building the Backyard Shed

When we tore down our garage, we knew we’d need to get some sort of shed to store tools and garden accessories.  However, since building the fence was the first priority, we were stuck with an ugly storage container for the summer.

IMG_2978 

We found an 8x12’ pre-fab shed at Lowes that would work perfectly in the back corner of our yard.  Unfortunately, it came in a million pieces (you can see the pile of shed pieces hiding under the blue tarp in the photo above!)

After seeing how much water pools in our backyard during heavy summer rains, we decided to pour a concrete pad as a base for the shed.IMG_2993

Last weekend, we finally got started building it.  Dave built all the walls and then got some help from our neighbours to put it all together (thanks Jim and Jose!)

IMG_2994IMG_2999IMG_3000  
Finally, we put on the roof and added shingles.

IMG_3002IMG_3007 
Next, we’ll paint the trim and install the window and doors.  Then, we’ll build the shelving inside the shed.  Soon, we’ll be able to finally get rid of our storage container!

Sunday, September 19, 2010

Porch Railing

When we last showed you our new front porch, all that was left to do was get a new railing.  After wandering through the neighbourhood and checking out the different styles of railings that people have, we decided to go with an aluminum railing.

While we had some issues with the quality of the installation, we were happy with the look of our new railing once things were corrected.

IMG_3004IMG_3006 

It’s definitely an improvement over the rusty old railing.  Here are the before and after:

IMG_4743IMG_3005

Wednesday, September 1, 2010

The Backyard Fence

Our new backyard fence is complete!  The fence runs down one side of the backyard, where the garage used to be. 

IMG_2973

As mentioned in a previous post, our official parking spot (which we will use as a patio) is located in our backyard.  Eventually, our deck will connect to the driveway end of the fence.  The patio is still a bit of a mess of supplies for future projects, including the shed that we plan to build in the back corner of the property.

 IMG_2975 IMG_2971

We built the fence out of cedar which was a mutual decision with our neighbour. At each step of assembly, to protect the wood, we finished it using Behr Cedar Natural Tone weatherproofing wood finish.  It was a very time consuming project, but we’re really happy with the result. 

Monday, July 19, 2010

Interlock and Asphalt

As part of this summer’s exterior work, we decided to get our driveway repaved at the same time we were getting our interlock laid in the backyard.

When we made the decision to get rid of our garage in the backyard, we decided to turn that area into a patio.  By laying interlock, the area will still meet the City’s zoning requirements for a parking space behind the house, but we’ll use the space as a patio.  Eventually, we plan to build a deck that will step down onto the patio.

 IMG_4885IMG_4886

Once the fence posts were installed, the contractors came and laid the interlock.  And then we finally got the new asphalt on the rest of the driveway.  Things are starting to look really good out there!

IMG_2967

Thursday, July 1, 2010

Fencing

While the workers were busy building our new porch in the front, we turned our attention to the backyard.  Once we tore the garage down, Dave and his friends installed the 6x6 cedar posts for our new fence.

IMG_4833 IMG_4832

The fence will run along the east side of our yard.  Since our “official” parking space will also be in our backyard, we decided that we will install a gate to fully enclose the backyard space.  Dave decided to dress it up a bit with a decorative piece across the top of the gate.  Finally, he stained the posts with a natural cedar-coloured stain.

IMG_4852

IMG_4841 IMG_4850IMG_4851 

Once the fence posts were completed, the paving company was ready to come and start prepping the backyard and driveway area for interlock and new asphalt.

Thanks to Chris, Rob, Stu, Shawn and Guy for all your help!

Thursday, June 24, 2010

The New Porch

We have a front porch again!  Once the porch was rebuilt with cinder blocks, it was finally time start making it look nice.

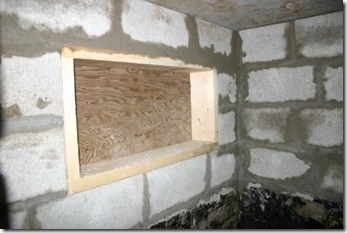
Inside the cold storage room, the walls were parged to leave a smooth surface.  Now it looks much cleaner and there isn’t anywhere for ants to live!  We also decided to get a window installed in the cold storage room, which will bring in some light and help us control the humidity during the summer.

IMG_4839

IMG_4894 IMG_4889 

Outside, we selected a faux stone to face the porch with.  We chose a greyish colour stone.

IMG_4845

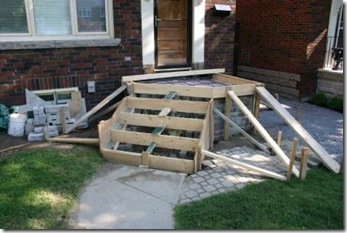
Once the stone was applied to the porch, the guys built the formwork for the concrete slab and stairs.  We decided to go with a bullnose on the stairs to dress it up a bit.

 IMG_4855IMG_4877 IMG_4875 IMG_4876 

Now all that’s left to do to finish the new porch is to choose and install a railing!

Friday, June 11, 2010

Porch Progress

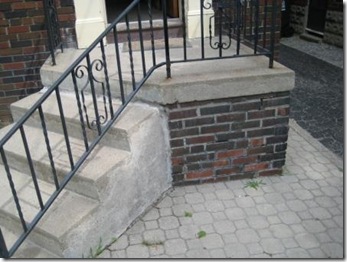
Once the waterproofing was done and the trench was backfilled, the guys got to work replacing our old front porch.  You can see from the picture below how badly the brick was crumbling behind the stairs.

IMG_4770 

They tore down the old porch, leaving us with a nice big hole leading directing into our basement.

IMG_4779

IMG_4786

IMG_4784

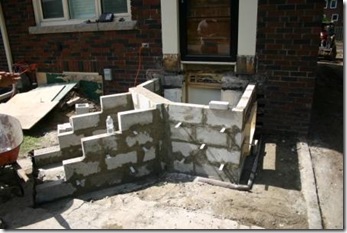
Finally, they rebuilt the porch with new cinder blocks, including a space for the new window.

IMG_4816IMG_4826IMG_4827   

The next step is parging the inside of the cold storage room and facing the new porch with faux stone.

Sunday, June 6, 2010

Not in the Plans

We’ve learned that it’s almost impossible to get through any major renovation without running into some unplanned, unexpected problems.  You may recall that our problems came in the form of ants in our cold storage room.

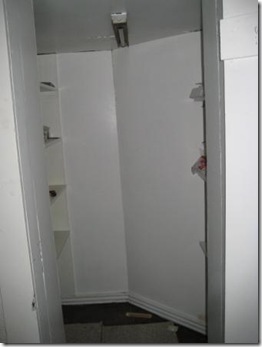
Our cold storage room is located in our basement, directly under the front porch.  We didn’t plan to do any work to it, since we intended to use it for storage.
20090718_1435

When we discovered an infestation of carpenter ants last summer, we decided to tear down the walls and ceiling to see how bad it was.  It was bad.

IMG_4702IMG_4747  IMG_4746

While tearing everything down to get rid of the ants that were living there, we could see that there was a moisture problem.   After getting the house sprayed for insects, we decided to leave the cold storage room unfinished for the winter and spring so that we could see if/how water was getting in.  When spring came, there were definitely signs of moisture and mould forming in that room. 

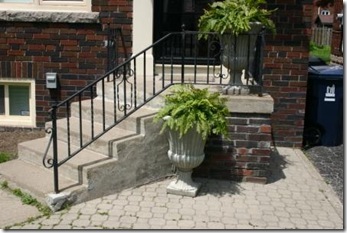
The exterior of the cold storage room (the front porch) showed signs of major deterioration when we bought the house.  We did some tuck pointing last summer to try and correct the problem, but moisture was still getting in.

Another issue was that the porch stairs were built without a footing, so over the years they had shifted and were falling away from the house.

The only real solution to all of these problems was to deal with our crumbling front porch.

20090706_1392 20090706_1391 

We called some experts to get some ideas and quotes.  Ultimately, we settled on the following plan:

  • dig up along the whole front of the house, including around the front porch, to waterproof below ground level from the outside.
  • tear down the porch to ground level and rebuild it completely.
  • add a window to the side of the porch, to allow for some ventilation in the cold storage room during humid summers.
  • build new concrete stairs with proper footing.
  • face the porch and stairs with faux stone.
  • parge the inside of the cold storage room.

It is a big project and not something that we had budgeted for.  But, in the end, we would rather have it done properly the first time.

New parging of exterior foundation walls:

IMG_4752

Sealant applied to foundation walls:

IMG_4757

Waterproofing membrane wrapping front of house:

IMG_4763 
Old clay weeping tile removed:

IMG_4755 

Now that the weeping tile has been replaced and the waterproofing is done, work is underway to rebuild the porch.  Hopefully we’ll finally have a functioning cold storage room this summer!

Wednesday, June 2, 2010

Living and Dining Room: Before and After

The one thing that kept our main floor from feeling complete for the last few months was the lack of a dining room table.  Once we found our table, the space was pretty much done.

The main design changes to the living and dining rooms include:

  • removing the archway
  • installing pot lights
  • adding the sliding door walkout to the backyard
  • installing new hardwood floor throughout the main floor
  • adding shutters to the living room windows.

Before:

 Looking towards the front hall from the living room:20090329_0998

 Looking at the living room from the dining room:20090329_0995

Looking into the dining room from the living room:20090329_0994 
After:

IMG_4632IMG_2938IMG_2934

We spent a lot of time looking for a dining room table that would be narrow enough to fit our space, but extendable so that we could seat a larger number of people.  The table search was harder than we expected.  After a couple of months of searching, a neighbour suggested we try Decorium, where we found a table that we were able to customize to fit our space and our style.

In the living room, we chose to get our old couch reupholstered and we were able to use most of our other living room furniture.  We painted the entire main floor, including the living room and dining room, Benjamin Moore’s Ballet White.  We’re still looking for some art for above the couch, which we hope will bring some colour into the space.

One of the biggest changes to the dining room was the fact that we removed the wall between the kitchen and the dining room, opening up the space.  We’ll share the final kitchen photos in a separate post.

Blog Widget by LinkWithin